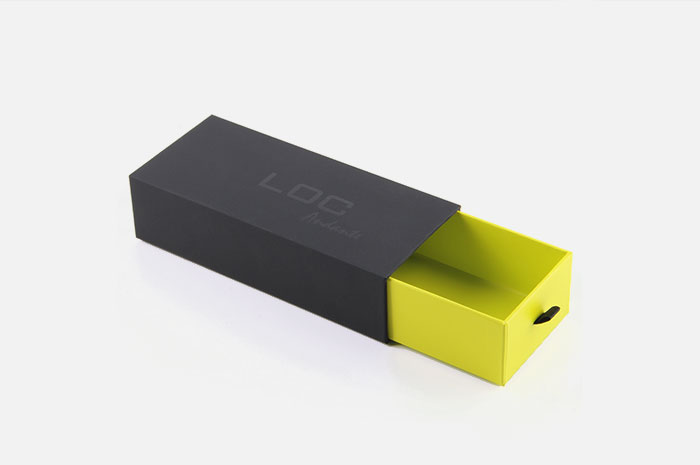
In the world of commercial packaging, a drawer box serves as a practical and visually appealing solution for presenting products. Whether it's for showcasing cosmetics, electronics, or other goods, crafting a simple yet effective drawer - style packaging box can enhance the product's marketability. This guide will walk you through the process of making a basic commercial drawer box, from preparing the necessary materials to the final assembly.
Materials
1.Cardboard or Corrugated Board: These are the most commonly used materials for commercial packaging drawer boxes due to their affordability, durability, and ease of customization. Cardboard offers a smooth surface that's great for printing and labeling, while corrugated board provides extra strength and protection, making it ideal for heavier products. Select a thickness based on the weight and size of the item to be packaged; typically, 1 - 3 mm thicknesses are suitable for most small to medium - sized products.
2.Adhesive: You'll need a strong adhesive to secure the box's components together. Double - sided tape is convenient for quick and clean bonding, especially when working with thinner cardboard. For corrugated board, a hot - melt adhesive gun or strong craft glue can create a more robust connection.
3.Printed Paper or Wrapping Material: To give your drawer box an attractive look, choose printed paper or wrapping material that matches the brand's aesthetic. This can be custom - printed with the product name, logo, and other marketing information, or you can opt for decorative papers available in various patterns and textures.
4.Plastic Inserts (Optional): If the product requires additional protection or organization, plastic inserts can be used. These inserts can be custom - molded to fit the shape of the item, preventing it from shifting during transit.
Tools
1.Cutting Tools: A sharp utility knife or a box cutter is essential for cutting through cardboard and paper. For more precise cuts, especially when working with intricate designs, a pair of heavy - duty scissors or a paper trimmer can be useful.
2.Ruler and Pencil: These are needed to measure and mark the cardboard accurately. A metal ruler is preferred as it provides a straight edge and is less likely to bend or warp during measurements.
3.Scoring Tool: To create clean folds without cutting through the material, a scoring tool, such as a bone folder or the back of a butter knife, can be used. This helps the box maintain its shape and makes folding easier.
4.Glue Applicator: If using hot - melt adhesive, a glue gun is necessary. For other types of glue, a small brush or a glue spreader can help apply the adhesive evenly.
Before cutting the materials, it's important to design the drawer box. You can create a simple template on paper first, taking into account the size of the product, the thickness of the material, and any additional features like handles or windows. The basic structure of a drawer box consists of an outer sleeve and an inner drawer.
1.Outer Sleeve: Measure the length, width, and height of the product and add a small allowance (usually around 5 - 10 mm) for a snug fit. The outer sleeve should be slightly larger than the inner drawer to allow it to slide smoothly. Draw the template on the cardboard, marking the areas for cutting and folding. Include tabs on the edges for gluing the sleeve together.
2.Inner Drawer: The inner drawer should be sized to fit the product precisely. Measure the product's dimensions and subtract a small amount (around 2 - 5 mm) to ensure it can be easily inserted and removed from the sleeve. Similar to the outer sleeve, create a template on the cardboard, marking the cutting and folding lines, and adding tabs for assembly.
Step 1: Cutting the Materials
1.Place the cardboard on a flat, stable surface. Using the ruler and pencil, transfer the template onto the cardboard accurately.
2.With the utility knife or box cutter, carefully cut along the marked cutting lines. When cutting corrugated board, make multiple passes to ensure a clean cut through all the layers.
3.Use the scoring tool to create folds along the marked folding lines. Apply gentle pressure to create a groove that will make folding the cardboard easier and more precise.
Step 2: Assembling the Outer Sleeve
1.Apply adhesive to the tabs on the edges of the outer sleeve template.
2.Fold the cardboard along the scored lines to form the sleeve shape. Press the tabs firmly onto the corresponding surfaces to secure the sleeve together. Make sure the corners are sharp and the edges are aligned properly.
3.If using printed paper or wrapping material, cut it to the appropriate size to cover the outer sleeve. Apply adhesive to the back of the paper and carefully wrap it around the sleeve, smoothing out any wrinkles or bubbles.
Step 3: Assembling the Inner Drawer
1.Similar to the outer sleeve, apply adhesive to the tabs of the inner drawer template.
2.Fold the cardboard along the scored lines and press the tabs to form the drawer shape. Ensure that the drawer's sides are perpendicular to the bottom for a sturdy structure.
3.If adding plastic inserts, place them inside the drawer and secure them with adhesive if necessary.
1.Once the outer sleeve and inner drawer are assembled, check the fit. The drawer should slide in and out of the sleeve smoothly without being too loose or too tight. If there are any issues with the fit, make adjustments by trimming the edges or adding additional layers of cardboard as needed.
2.Inspect the box for any visible flaws, such as uneven cuts, rough edges, or poorly applied adhesive. Use sandpaper to smooth out any rough areas and touch up the glue if needed.
3.Add any final decorative elements, such as stickers, ribbons, or additional labels, to enhance the box's appearance and make it more appealing to customers.
Making a simple commercial drawer box is a straightforward process that can be customized to suit various products and branding needs. With the right materials, tools, and a bit of creativity, you can create packaging that not only protects the product but also makes a strong visual impact in the market.

GET A QUOTE
export@86jg.com